![]()
# How to Use PIXEL-X Controller
- Setting up Camera
- Power ON
- Power OFF
- Config ADC/DAC Channels
- Get Temperature
- Reset Shutter
- Taking a Photo
- Acqusition Set
- Cooling
- Start Exposure
- And Wait
- Image Processing
- Scaling
- Image Subtraction
- Lumin Statistics
- False Color
- ROI Frame
- Pixel Map
- How about Scripting
- Language Reference
- Attentions
# Setting up Camera
After you have plugged the camera, you are able to use it in a few seconds, but make sure you have opened the controlling application and clicked Analog Power button which is in the Debug tab. It is the prerequisite for all the following operation.
- Power ON
Whilst the analog power is on, the button will looks like being pressed. When you release the button or close the application, a Power-off command will be sent. If any command fail, a prompt window will show.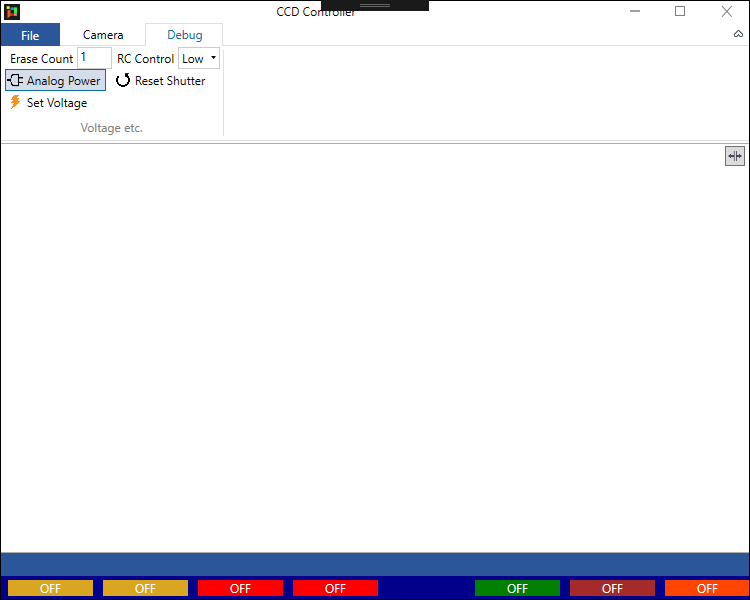
- Power OFF
It should be noted that the analog power won't be turned off if the application crash due to misoperation, when you re-start the application, the status ofAnalog Powerbutton will be reset to unchecked, but the power may still be on. - Config ADC/DAC Channels
You can access the Voltage Panel by clickingSet Voltagebutton. CLK bias voltage can be set by editing textbox and clicking→button, and can be checked by selecting items in the drop-down list. The available channel list depends on the model number of camera. If the access to any channel is failed, an "Error" will be displayed in the textbox.
- Get Temperature
Once you pressTemprbutton, the temperature checking thread will be started automatically, and the temperature will be displayed on the status bar at the bottom. If your camera does not have the related temperature check point, an "Error" will be displayed in status box.
- Reset Shutter
Reset Shuttercan help you reset the shutter to default (Closed) status.
# Taking a Photo
After turning on the analog power, you can start taking photos, but make sure you have configured the acquisition mode so that the camera can work the way you want.
- Acquisition Set
As you can see,Cooling Target,Readout Speedand many other parameters can be set easily here by selecting items in drop-down list or editing textbox and pressingenter(ortabwill do).
The combobox within the red frame in the picture bellow is a pre-set option. For example, if you choose100khz Readout, then all the parameters will be set to the pre-set value related to 100khz.
In the ROI and Bin setting, "S" meansStartand "K" meansKeep, you can edit the textbox and pressenterto set. If you want to reset the parameters to default value, pressr.
- Cooling
If you want to cool the camera while exposing, check toggle buttonCooling, - Start Exposure
After completing the Acquisition Set, you can pressStart Exposeto take a real photo. During the exposure, the button will turn grey, and a process bar will appear at the bottom.
- And Wait
Any other operation is not recommended during the exposure, but if you want to stop it, just pressStop Exposeand the process will be cancelled.
# Image Processing
When the exposure is complete, a fits image will be generated, and the Image contextual tab will become available. Of course you can also access this tab by opening an external fits image.
- Scaling
You can zoom in and zoom out using the scrol wheel. You can split the window side by side an drag images from one to another. The display window can be resized along with the application window.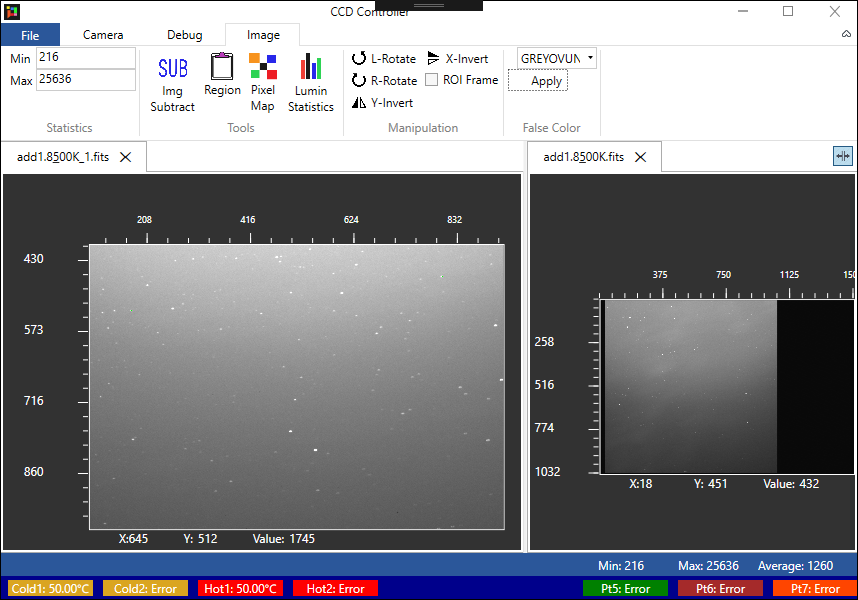
- Image Subtraction
If there are two or more images in processing, you can useImage Subtractionto subtract one image from another. This function can be used to diff images and show tracks of a moving object. - Lumin Statistics
Statistics of luminosity of the fits image. Make sure you have selected a fits image before using this function - False Color
Simply choose the color and pressApply, and then we have some beautiful picture (False).
- ROI Frame
"ROI" is the abbreviation of "Region Of Interest". Check theROI Framecheckbox and press theRegionbutton, it is easy to analyze the region that you select.
- Pixel Map
Pixel Mapis a simple tool to track the pixels around the pointer, it is very useful in many cases.
# How about Scripting
Script is a way for user to achieve batch operation (for example, taking a hundread pictures and save them as fits). It is a lua based script language interpreter (using MoonSharp interpretor).
Here is an official tutorial where you can find elaborate documentation.
Or you may just need to lern basic syntax from Quick Start. I swear it is easy to use.
Language Reference
Currently, there are global function available as follows:- "StartExposure()"
Easy to understand, start an exposure progress. - "StopExposure()"
Stop it. - "GetCurrentImage()"
Get the currently sellected image tab (as ImageControl). - "SaveCurrentImage()"
And save it.
Here is an example:

- "StartExposure()"
Attentions
Do not loop 10000 times or more.
← 功能特性 SDK开发&界面使用说明 →